Your node

Your wallet,
connected to your node.

Two steps, in this order: open the tunnel, then tell your wallet to query your node instead of public servers. Every screen is shown, in the order you will see it, for AmneziaWG, then for Electrum, Sparrow, BlueWallet and Nunchuk.

A wallet fresh out of the box asks strangers' public servers for its balance, handing them the list of your addresses to do so. The step described here replaces those strangers with your node, the one included in your NODECOVE subscription. Allow a quarter of an hour the first time; there is nothing to redo afterwards.

What you will enter

One address,
written two ways.

Every wallet on this page asks for the same thing: a hostname, a port, and whether the connection is encrypted. Some want all three on a single line, others in separate fields. Here are the two forms; it's the only thing to remember from this page.

On a single line: Electrum, desktop and Android

The final :s announces the encrypted connection. A :t would mean "unencrypted": that is not what we serve.

electrum.nodecove.net:50002:s

In separate fields: Sparrow, BlueWallet, Nunchuk

Host on one side, port on the other, and the SSL or TLS switch turned on. Nunchuk has only one field and does not expect the suffix: host and port are enough.

electrum.nodecove.net
Port 50002 · SSL or TLS on

The tunnel first, always

Our node does not answer from the open internet: it only answers inside the tunnel. A wallet that is configured correctly but whose tunnel is closed will therefore stay hopelessly "not connected", with nothing actually misconfigured. This is intentional: no one can probe this node, or count who connects to it.

What your node changes, and what it doesn't

It changes who learns your addresses: your node already knows them, since it's yours, and public servers will no longer see them. It does not change what is written into the chain: a transaction remains public, and where your bitcoins came from stays visible to anyone tracing the trail. The What we see page states exactly where this limit stops.

Part one · the tunnel

Open the tunnel
with AmneziaWG.

One application, one file, one switch. AmneziaWG takes the .conf file we give you exactly as it is, and the obfuscation lines it contains are read without anything to type. It runs on iPhone, Android, Mac and Windows; on Linux, the same protocol comes as command-line tools. An ordinary WireGuard client will not do: it ignores those lines, so the tunnel opens where nothing is filtered and stays shut everywhere else.

Download AmneziaWG Other systems

On iPhone iOS 15 or newer

  1. 1

    Install AmneziaWG from the App Store.

  2. 2

    Save the .conf file attached to your delivery email, or downloaded from your account: it lands in Downloads.

  3. 3

    In the Files application, press and hold the file until the menu appears. A simple tap only opens a preview.

  4. 4

    Share, then AmneziaWG in the list of applications. If it is not there, scroll, or tap More.

  5. 5

    Tap the switch to the right of the tunnel's name. iOS asks for permission to add a VPN configuration: Allow. The switch turns green.

On Android Android 7 or newer

  1. 1

    Install AmneziaWG from Google Play.

  2. 2

    In the application, tap the ➕ icon at the bottom right, then Import from file or archive.

  3. 3

    Choose the .conf file, usually in Downloads. If that folder does not open by itself, the menu icon at the top left leads to it; otherwise Recents, or a search on the file's name.

  4. 4

    Tap the switch to the right of the tunnel's name. Connected appears underneath.

Another VPN application in the way

Android grants the VPN permission to one application at a time. If another VPN is installed, turn it off before importing, and in Settings → Network & Internet → VPN, on that other application's gear icon, turn off Always-on VPN and Block connections without VPN. The exact path varies by phone brand.

On Mac macOS 12 or newer

  1. 1

    Install AmneziaWG from the Mac App Store: publisher Privacy Technologies OU. The release published on August 24, 2026 carries version number 3.1.4.

  2. 2

    Open the application. The window is called Manage AmneziaWG Tunnels; it is empty the first time.

  3. 3

    Click Import tunnel(s) from file, or go through File → Import Tunnel(s) from File…, and choose the .conf file downloaded from your account, it is in Downloads. Then Import.

  4. 4

    macOS asks for permission to add a VPN configuration: answer Allow. Without it, the tunnel will not open.

  5. 5

    Select the tunnel and click Activate: the status goes through Activating… then shows Active. To close it, Deactivate, or Tunnel → Toggle Status (⌘T).

A permission to grant, once. If the tunnel refuses to open, go to System Settings → Privacy & Security, General section, and click Allow for AmneziaWG.

The file already carries the obfuscation. The Jc, Jmin, Jmax, S1, S2 and H1 to H4 lines in our configuration are read by the application: there is nothing to enter by hand. They must, however, match the client's protocol version, our files are written for AmneziaWG 3.1.

On Windows from Windows 7 to Windows 11

  1. 1

    Download the .msi file matching your machine from the published releases of the Windows client: amneziawg-amd64 for a common PC, arm64 or x86 depending on your case. The release from August 21, 2026 carries version number 3.1.0.

  2. 2

    Run the file and answer Yes to Windows's prompt: the installation requires administrator rights.

  3. 3

    Open AmneziaWG, then Add Tunnel → Import tunnel(s) from file, choose the .conf file and click Open.

  4. 4

    Click Activate. Afterwards, the icon near the clock offers Manage tunnels… to reopen the window.

On Windows, this application and no other. It is the only path supported by the publisher for our configurations, and an ordinary WireGuard client would leave the obfuscation lines unread.

On Linux from the command line

There is no graphical application. You install the amneziawg kernel module and the amneziawg-tools utilities, place our file at /etc/amnezia/amneziawg/nodecove.conf, then run awg-quick up nodecove as administrator, and awg-quick down nodecove to close it.
Where to find these applications

Mac: AmneziaWG on the App Store. Windows: the .msi files from the latest published release of the Windows client. Linux: the kernel module and the command-line tools. The publisher's instructions are published in its documentation.

Part two · wallets

Electrum,
on a computer.

Electrum accepts the full address on a single line, and can limit itself to a single server, it is the most direct wallet to connect to your own node.

Download Electrum Other systems

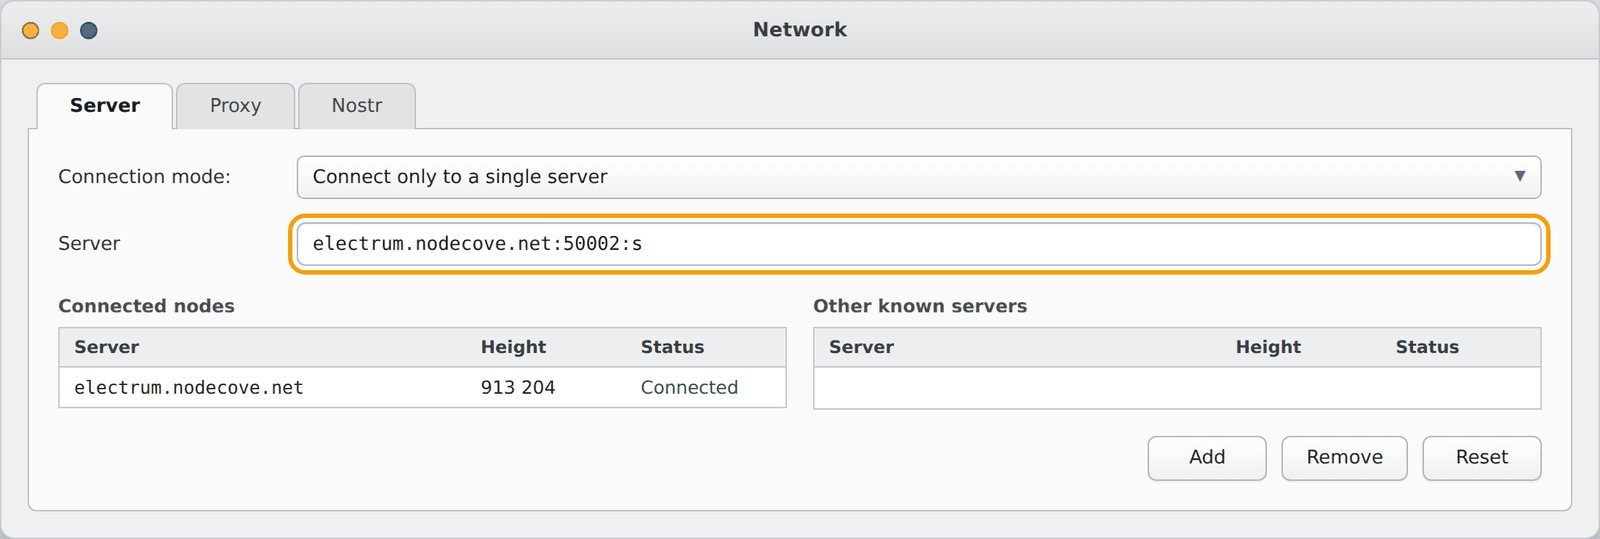
  1. Menu bar → Tools → Network.
  2. Server tab.
  3. Connection mode list → Connect only to a single server.
  4. Server field → electrum.nodecove.net:50002:s.
  5. Close the window. The line appears under Connected nodes, with status Connected and the height of the latest block.
Electrum Network window, Server tab, Connect only to a single server mode and Server field filled in with electrum.nodecove.net:50002:s
Reconstruction of the screen based on version 4.8.1 · the appearance may vary slightly. The boxed field is the one to fill in.

The point not to miss. In automatic mode, Electrum stays connected to about ten public servers in addition to yours: they do not learn your addresses, but they see that a client is querying the chain. Connect only to a single server mode removes this remainder. On the command line, this is written as: electrum --oneserver --server electrum.nodecove.net:50002:s

The certificate. Electrum only talks to servers over an encrypted connection and accepts each server's own certificate: on first connection, it remembers ours and will warn you if it ever changes. There is nothing to check.

The same wallet, on a phone

Electrum,
on Android.

The Android application has the same mechanics, in a single screen.

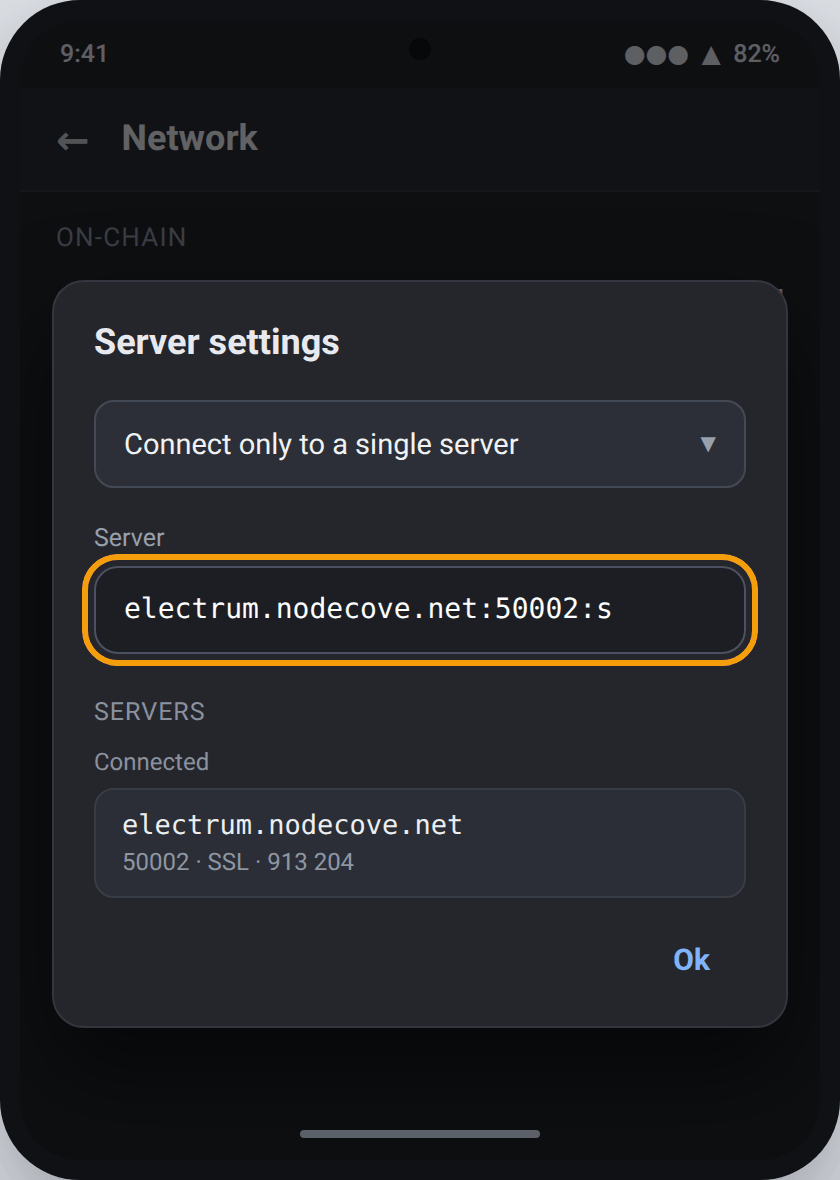
  1. Application menu → Network.
  2. Server Settings button.
  3. Connection mode list → Connect only to a single server.
  4. Server field → electrum.nodecove.net:50002:s.
  5. Ok. The Servers section shows our server under Connected.
Electrum Server settings screen for Android, Connect only to a single server mode and Server field filled in
Reconstruction of the screen based on version 4.8.1 · the appearance may vary slightly.

On a phone, the tunnel and the wallet coexist: the AmneziaWG tunnel must stay active while Electrum synchronises, otherwise the screen will stay stuck on an old block height.

For hardware wallets

Sparrow,
on a computer.

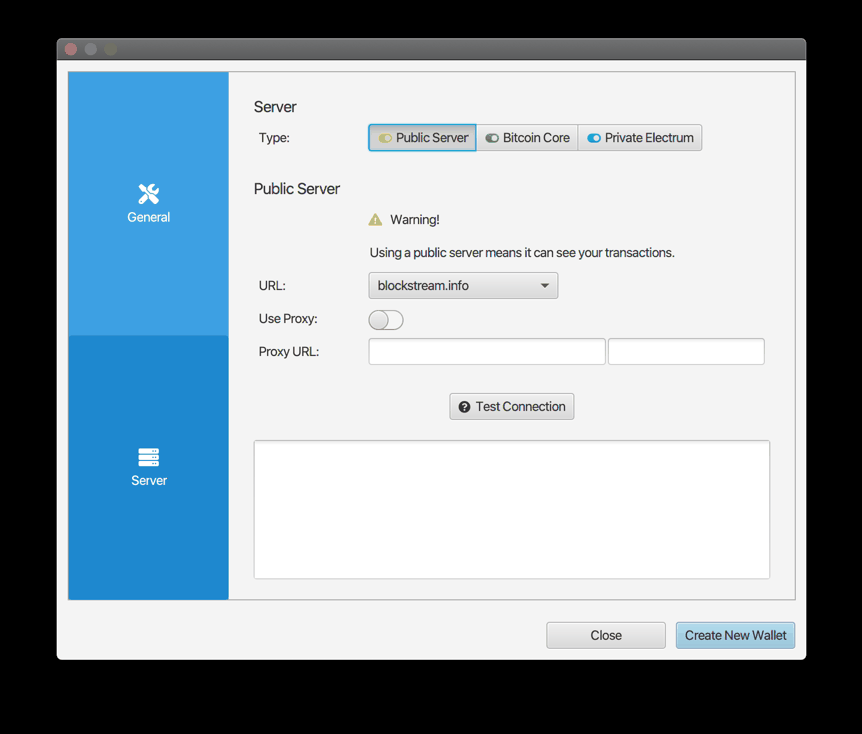
Sparrow asks the question right on its first screen: public server, Bitcoin Core node, or private Electrum server. It is the third answer that concerns us.

Download Sparrow Other systems

  1. On the home screen, the Configure Server button.
  2. Type → Private Electrum.
  3. URL → electrum.nodecove.net · port field → 50002.
  4. Use SSL → on. The Certificate field stays empty: it is only used for servers with a particular certificate.
  5. Test Connection. The status bar indicator turns green.
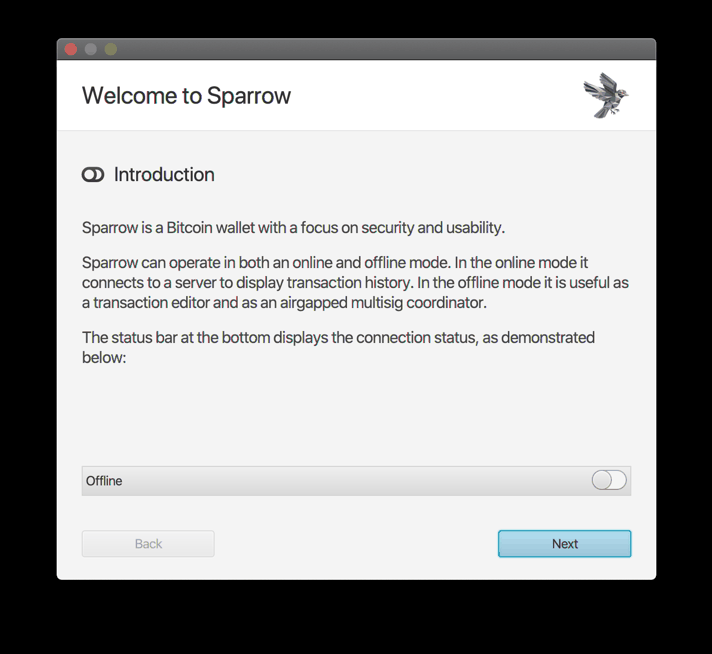
Sparrow home screen with its Configure Server button
The home screen and its Configure Server button, bottom right. Screenshot from Sparrow's official documentation.
Sparrow Server window, with the three types Public Server, Bitcoin Core and Private Electrum, and the Test Connection button
Sparrow's Server window, official screenshot. It is shown here on Public Server, the default option, hence the warning displayed: a public server sees your transactions. It is the third button, Private Electrum, that you need to choose; the URL, port and Use SSL fields then appear in the same place.

Sparrow expects separate fields: do not write :50002:s after the hostname, the connection would fail. Its own documentation puts it plainly: only connect to a server you trust, which is precisely the point of having your own.

On iPhone and on Android

BlueWallet.

BlueWallet chooses at random, by default, from a pool of public servers. Designating a preferred server puts an end to this lottery.

Download Blue Wallet Other systems

First: put Blue Wallet in your language

Blue Wallet often opens in English, even on a phone set to another language. Changing it takes thirty seconds.

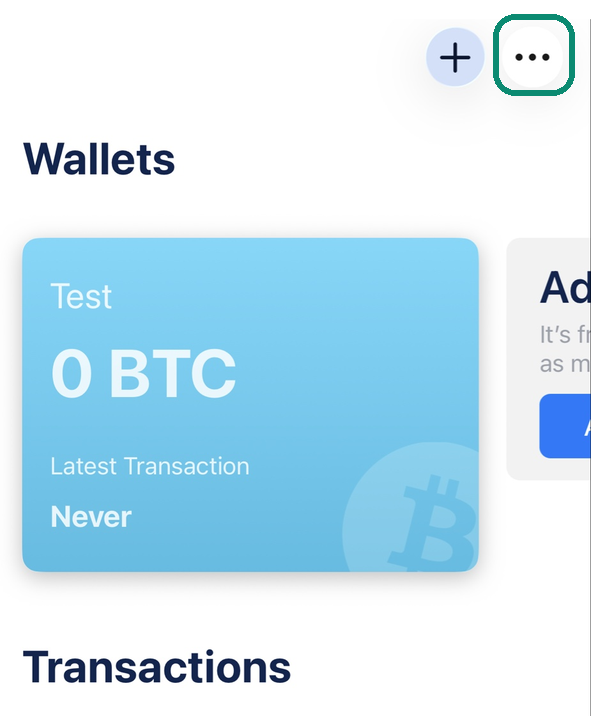
  1. On the Blue Wallet home screen, tap the three dots … at the top right.
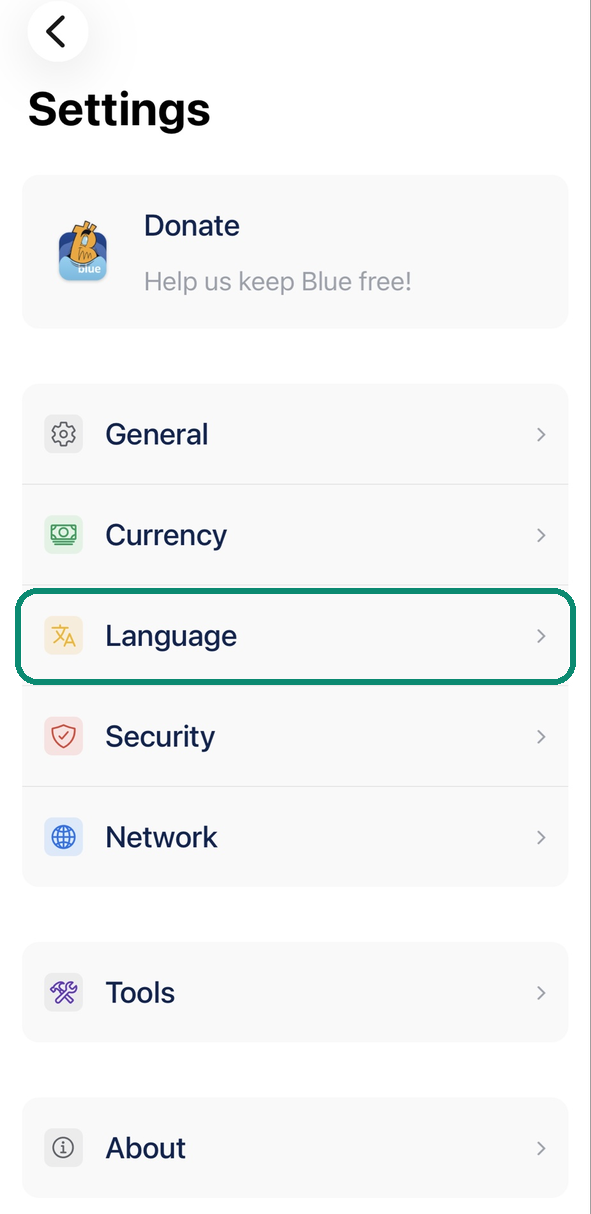
  2. Tap Settings, then the Language row.
  3. Choose your language in the list.
  4. Close Blue Wallet completely, then reopen it: it is now in your language.
Blue Wallet home screen, the three dots at the top right framed
1. The three dots …, at the top right of the home screen.
Blue Wallet Settings screen, the Language row framed
2. In Settings, the Language row.
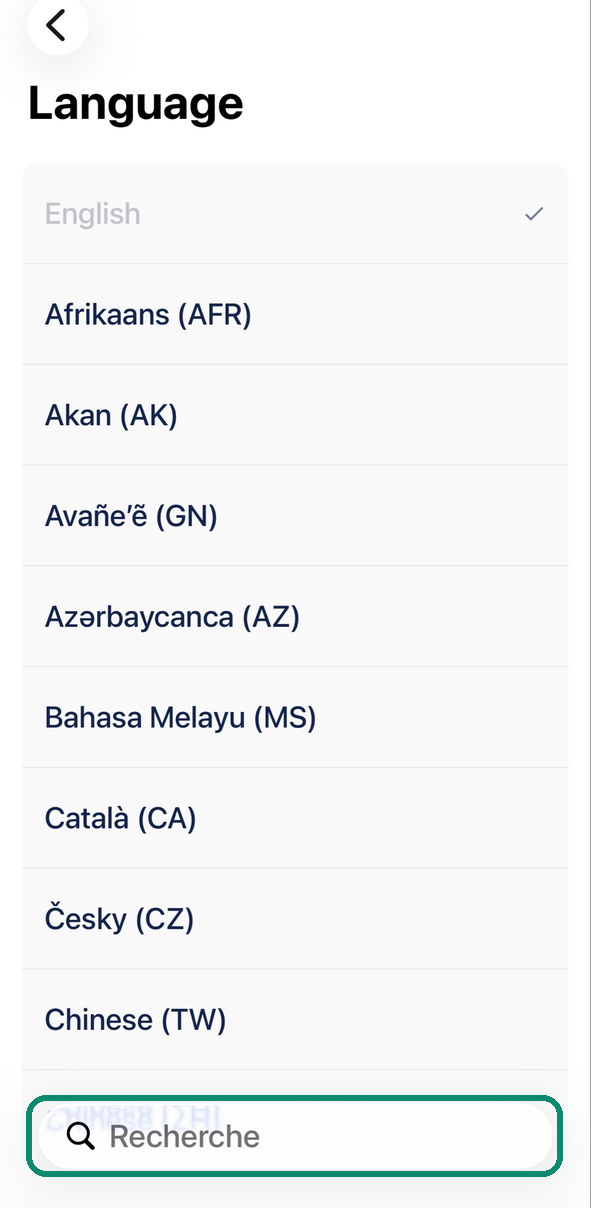
Blue Wallet Language list, the search field framed
3. The list of languages: scroll down, or type yours in the search field.

Bull, for its part, follows the phone's language on its own.

Receiving bitcoin: copy your address

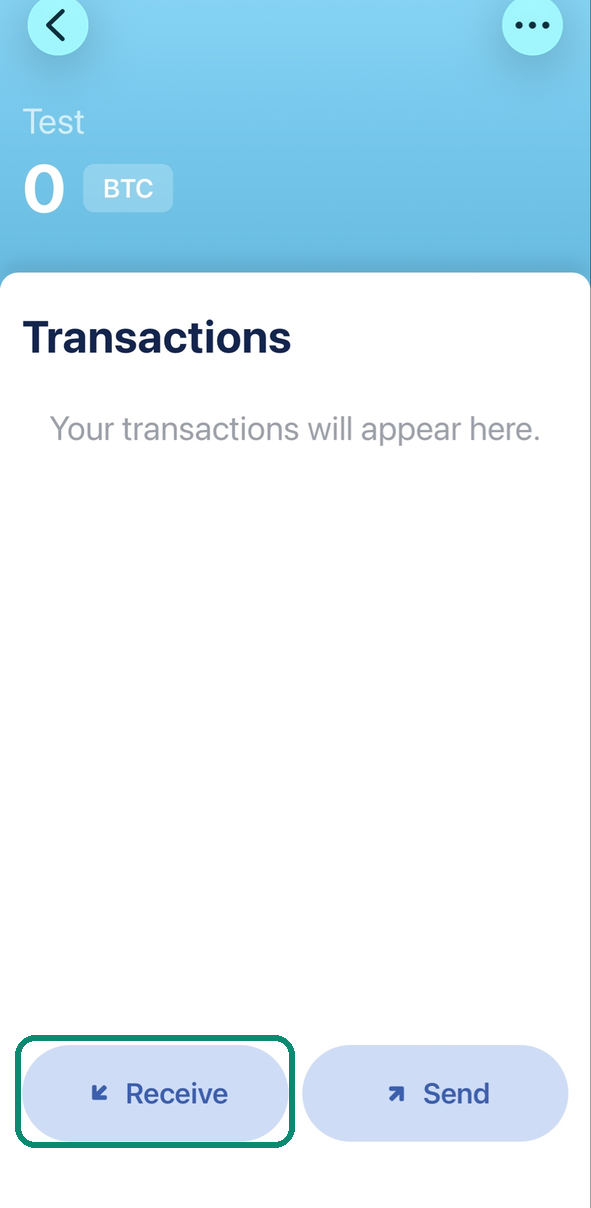
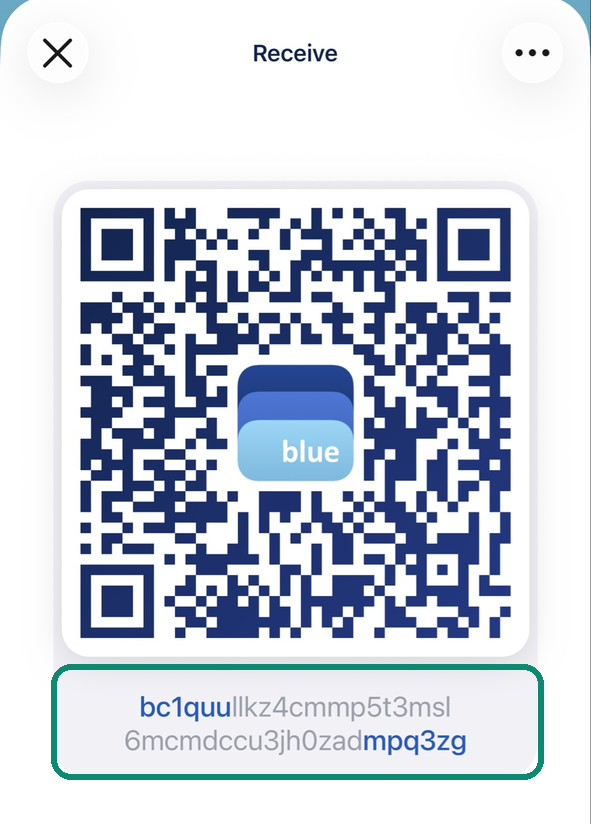
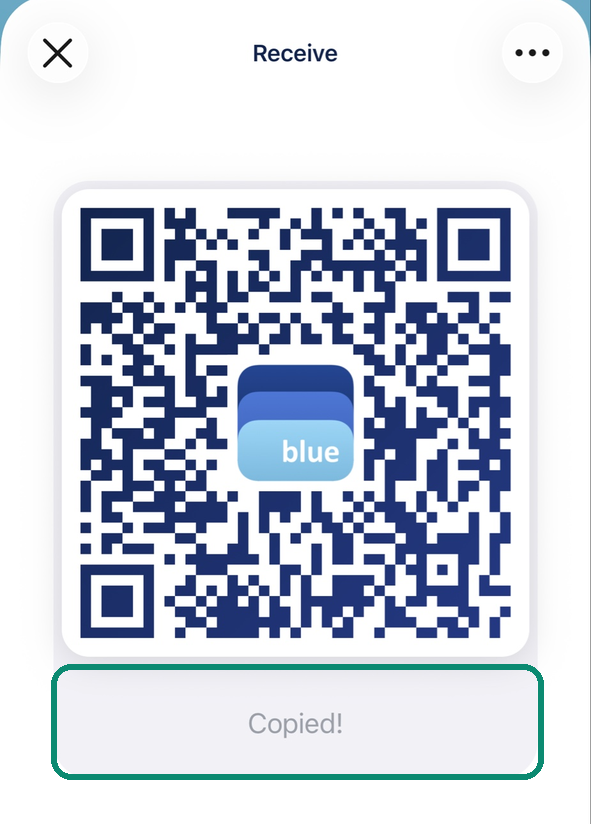
In your wallet, tap Receive, then tap the address under the QR code: Copied! appears, it is copied. Paste it into the app that is sending you the bitcoin.

Blue Wallet wallet screen, the Receive button framed
1. In your wallet, Receive.
Blue Wallet Receive screen, the address under the QR code framed
2. Tap the address under the QR code.
Blue Wallet Receive screen showing Copied! in place of the address
3. Copied! replaces it: the address is copied.

Screenshots in English: in your app, the same buttons carry the names given in the text.

Receiving in Bull: copy your address

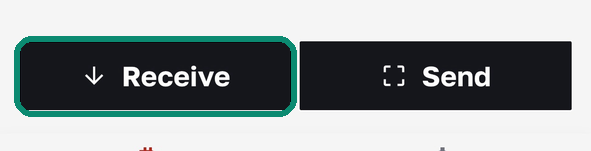
  1. In Bull, tap Receive.
    Bull Wallet, the Receive button framed
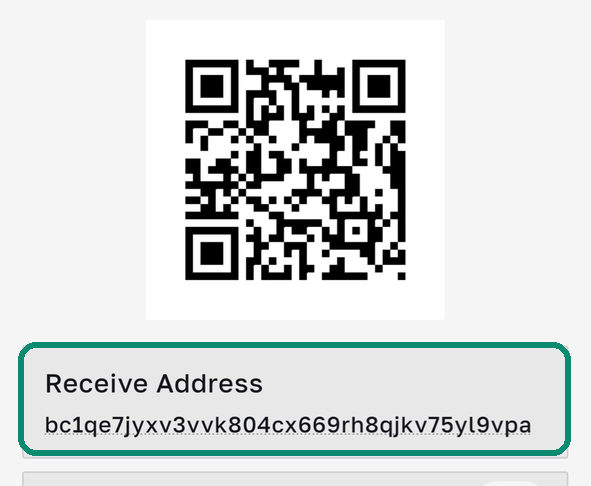
  2. Under the QR code, tap the Receive Address box.
    Bull Wallet Receive screen, the Receive Address box framed
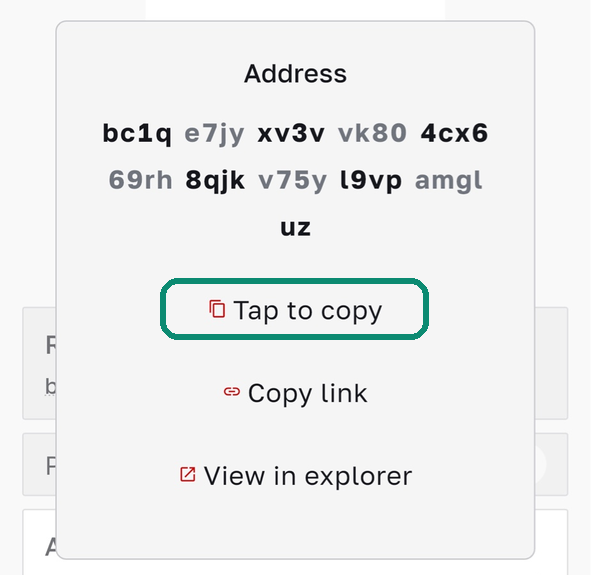
  3. In the window that opens, tap Tap to copy.
    Bull Wallet address window, Tap to copy framed
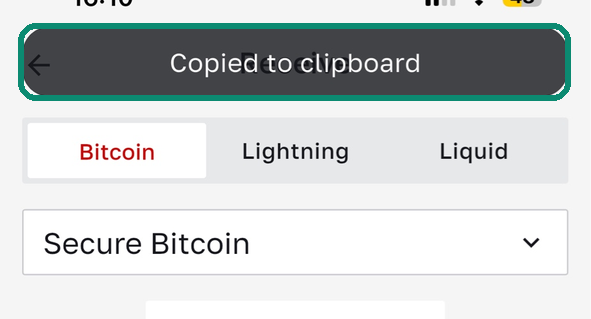
  4. Copied to clipboard appears at the top of the screen: the address is copied.
    Bull Wallet Receive screen, the Copied to clipboard message framed

Sending from Blue Wallet

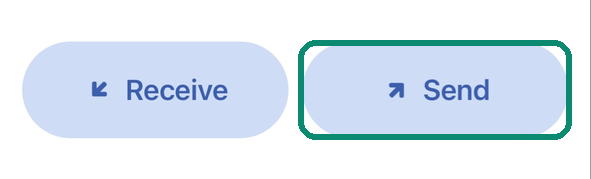
  1. Open Blue Wallet and tap Send.
    Blue Wallet wallet screen, the Send button framed
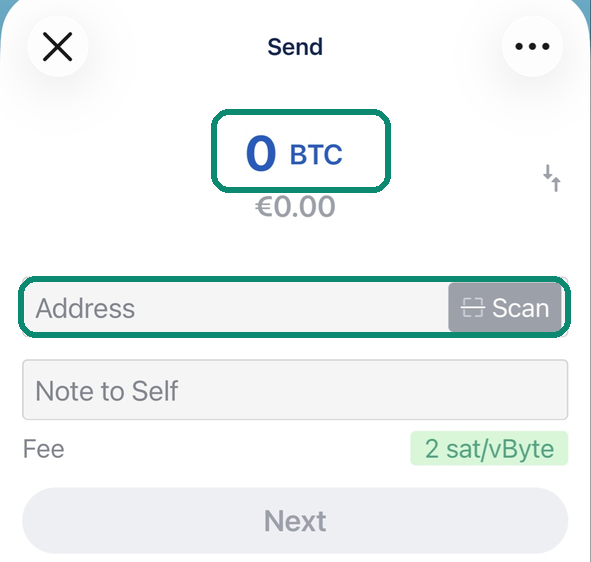
  2. Paste the address into the Address field. Tap 0 BTC and enter the amount, then Next, and confirm.
    Blue Wallet Send screen, the amount and the Address field framed

Paying from Blue Wallet: copy the address, then the amount

  1. On the payment page, copy the address first. Touching the address is not enough: tap the small copy icon just next to it.
    NodeCove payment page, the small copy icon next to the address framed
    The small icon next to the address copies it.
    NodeCove payment page, the copy icon turned into a tick
    It turns into a tick: the address is copied.
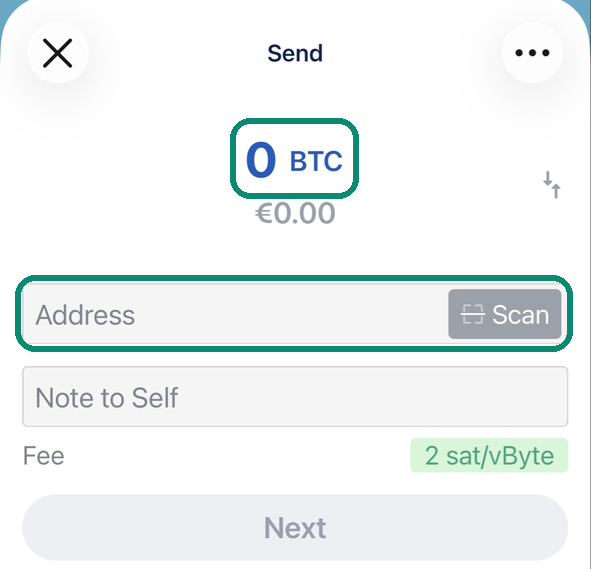
  2. Open Blue Wallet, tap Send, and paste the address into the Address field.
    Blue Wallet Send screen, the amount and the Address field framed
    The Send screen: the amount at the top, the Address field below.
  3. Go back to the payment page and tap the amount in BTC: it copies with a single tap, even though nothing suggests it.
    NodeCove payment page, Copied shown in place of the amount
    Tap the amount: Copied replaces it for a moment.
  4. In Blue Wallet, tap the amount 0 BTC at the top of the screen, paste, then Next, and confirm.

Is the payment page open on another screen? Tap Scan in Blue Wallet and aim at the QR code: the address and the amount are filled in at once.

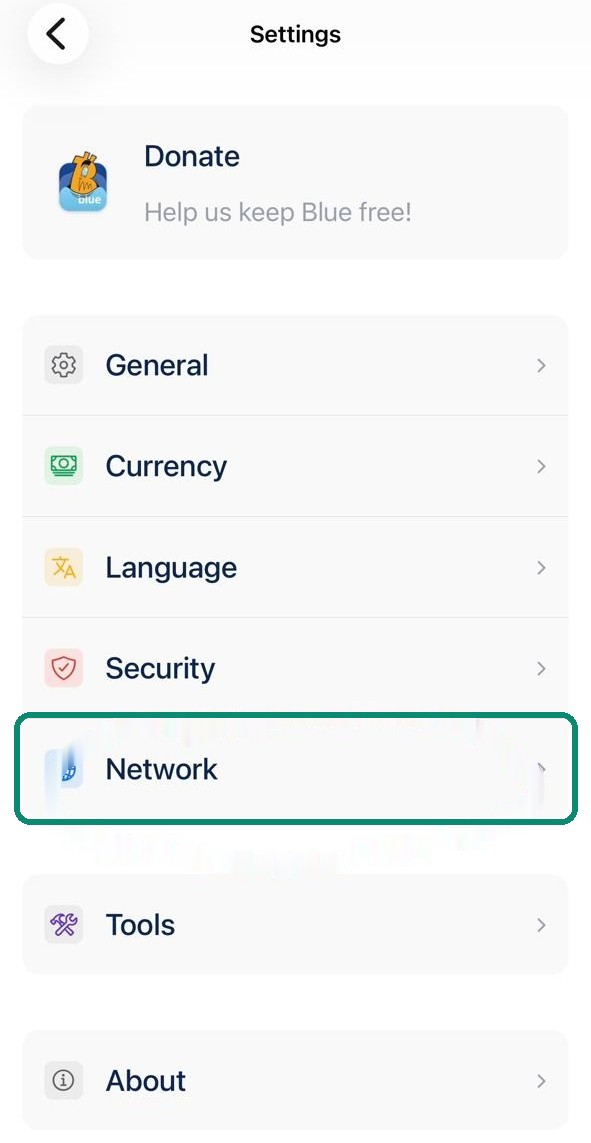
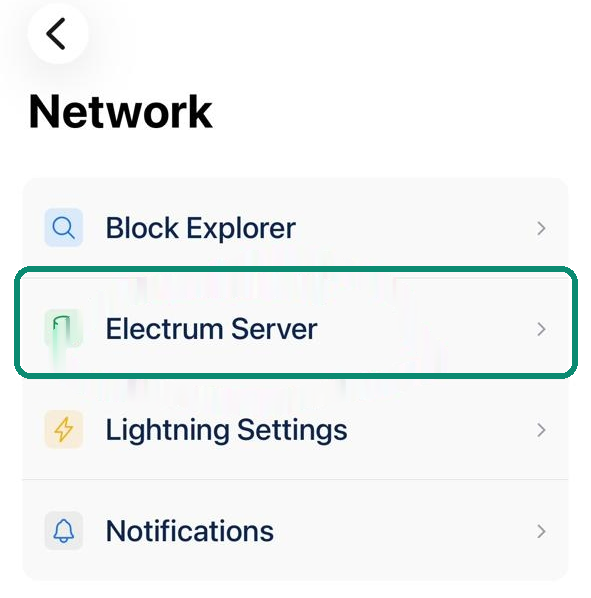
  1. Settings → Network → Electrum Server.
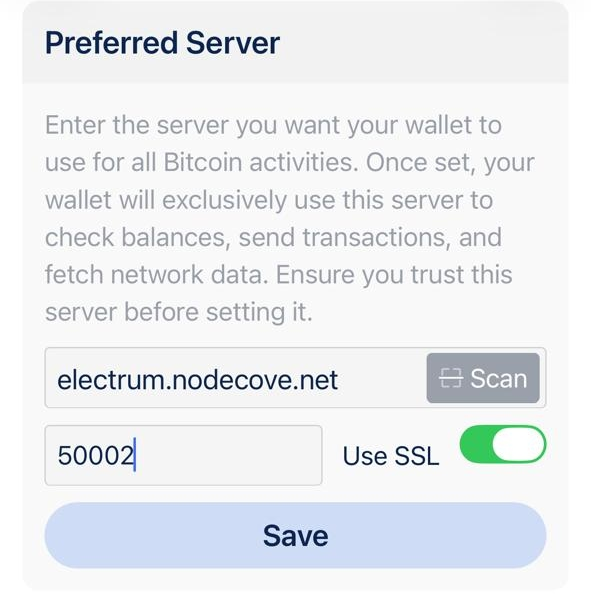
  2. Host field → electrum.nodecove.net.
  3. Port field → 50002.
  4. Use SSL → on.
  5. Save. The application warns that a restart may be needed for the change to take effect: close it fully and reopen it.
Blue Wallet home screen, the three dots at the top right framed
1. On the home screen, the three dots … at the top right.
Settings screen of Blue Wallet, with the Network row framed
2. In Settings, the Network line.
Network screen of Blue Wallet, with the Electrum Server row framed
3. In Network, the Electrum Server row.
Preferred Server screen of Blue Wallet showing electrum.nodecove.net, port 50002, and Use SSL enabled
4. electrum.nodecove.net in the first field, 50002 in the second, Use SSL enabled, then Save.
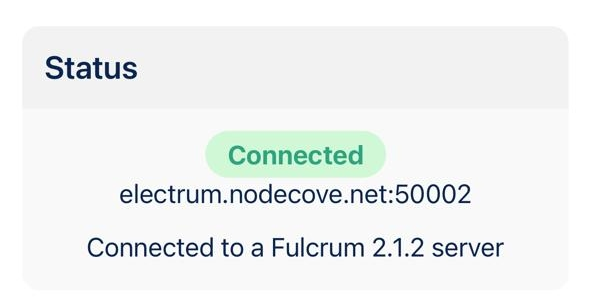
Status block of Blue Wallet showing Connected to electrum.nodecove.net on port 50002
5. The Status block shows Connected and names the server reached.

Screenshots taken in Blue Wallet on iPhone. The green frame marks the row to tap: it is not part of the app.

The application warns you that designating a preferred server disables the connection to a randomly suggested server: that is exactly what you are after. Reset to default undoes the setting if you want to go back.

On a phone, including multi-key setups

Nunchuk.

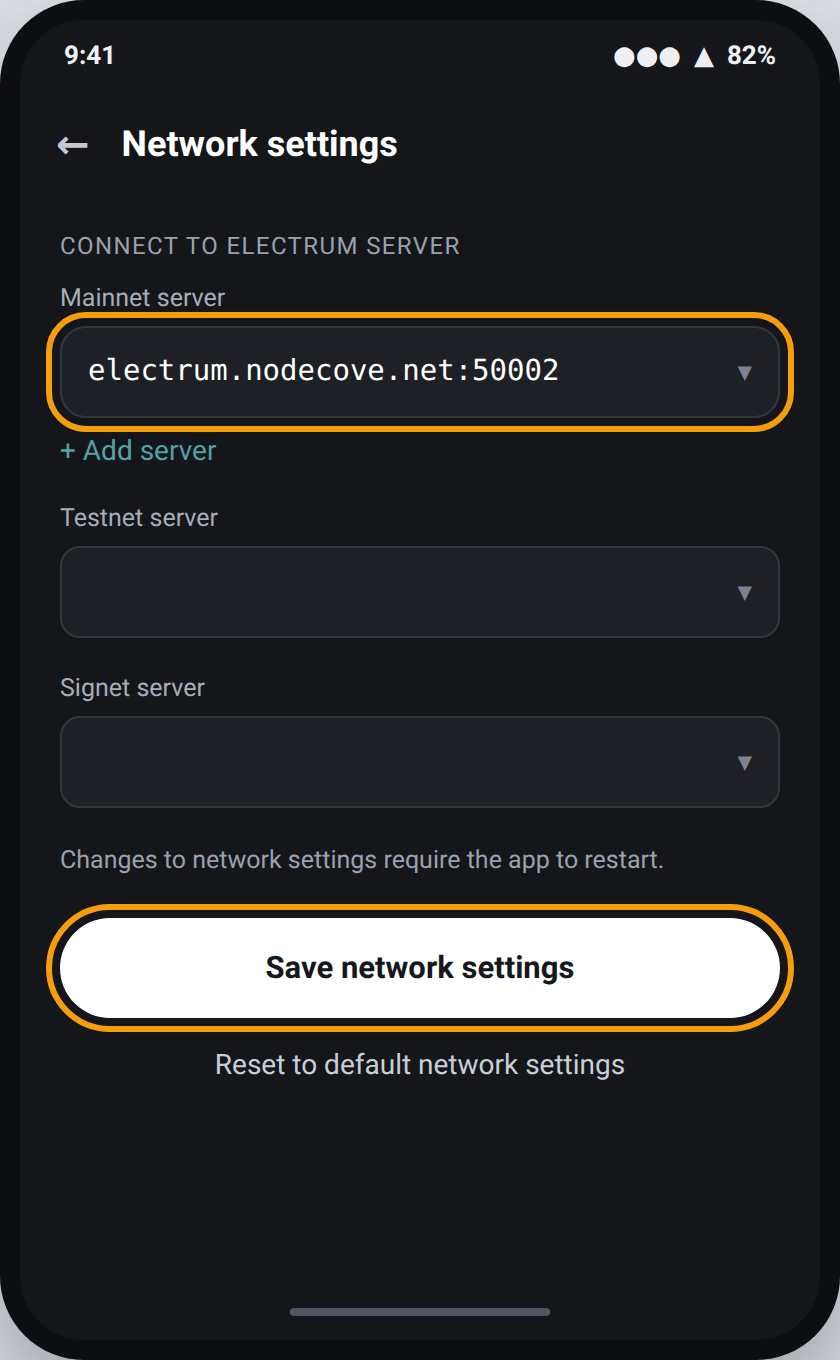
Nunchuk keeps a list of servers and asks to restart after the change.

  1. Profile button, bottom left, to open settings.
  2. Network settings.
  3. Add server, then enter electrum.nodecove.net:50002 under Mainnet server.
  4. Save network settings.
  5. The application restarts: the network setting change requires it.
Nunchuk Network settings screen with the mainnet server filled in and the Save network settings button
Reconstruction of the screen based on the February 2022 documentation, the appearance may vary noticeably on recent versions.

Nunchuk does not expect a protocol suffix: enter the host and the port, without :s. Leave the Testnet server and Signet server fields as they are; they do not concern the bitcoins you hold.

On a phone, bitcoin only

Bull.

Bull Bitcoin's wallet keeps your keys on the phone and only accepts bitcoins. It applies the server change immediately, with no restart needed.

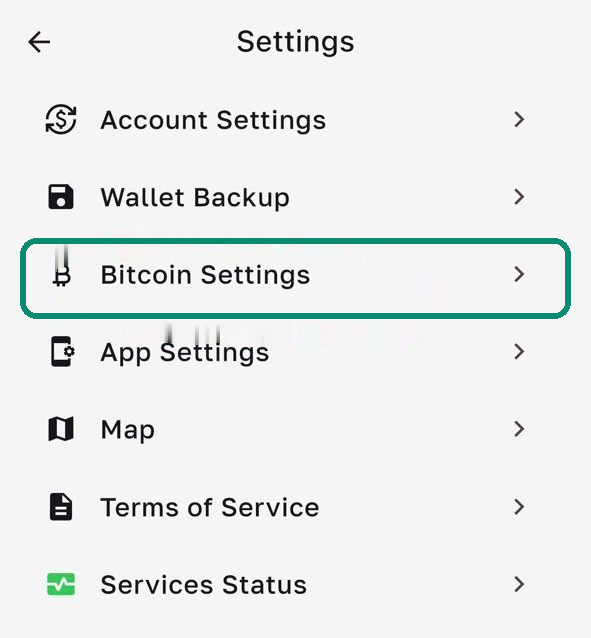
  1. Gear icon at the top of the home screen, then Settings.
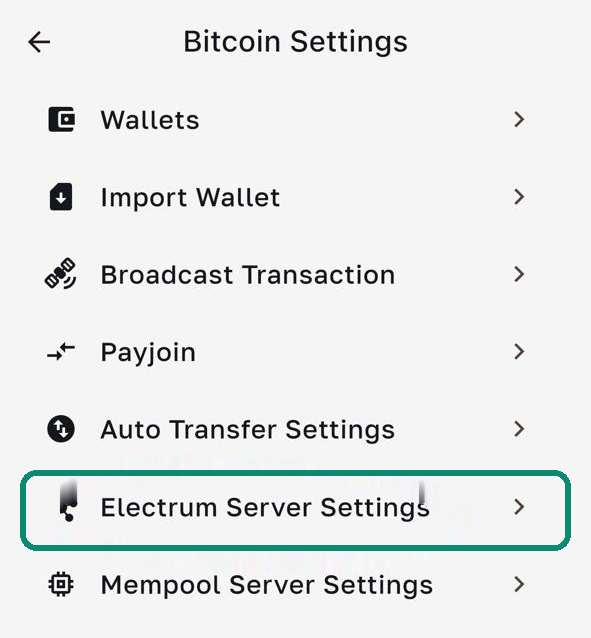
  2. Bitcoin Settings → Electrum Server Settings.
  3. At the very bottom of the list, Add Custom Server.
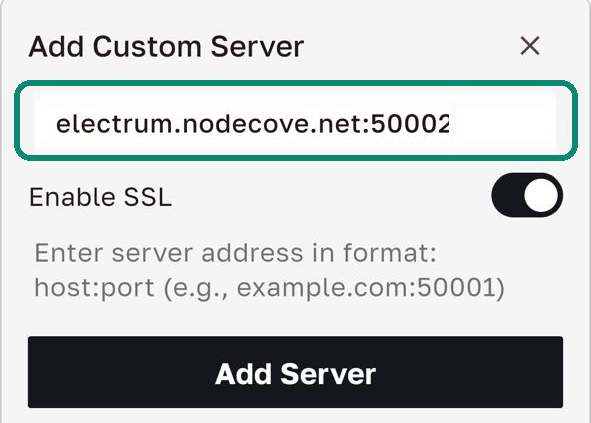
  4. The only field in the window → electrum.nodecove.net:50002. The host and the number joined by a colon, nothing else: neither https:// nor a :s suffix, which this version does not expect.
  5. Leave Enable SSL enabled, it is what encrypts the connection, then Add Server.
Settings screen of Bull Wallet, with the Bitcoin Settings row framed
1. The gear icon opens Settings: choose Bitcoin Settings.
Bitcoin Settings screen of Bull Wallet, with the Electrum Server Settings row framed
2. Then Electrum Server Settings.
Add Custom Server window of Bull Wallet showing electrum.nodecove.net:50002 with Enable SSL enabled
3. electrum.nodecove.net:50002, Enable SSL enabled, then Add Server.
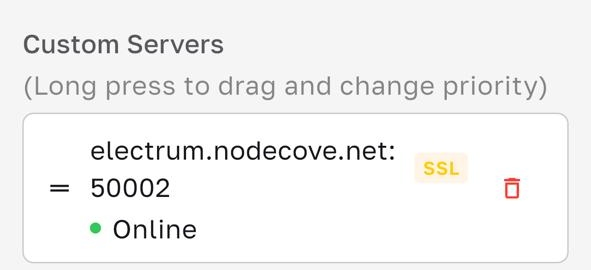
Custom Servers list of Bull Wallet showing electrum.nodecove.net:50002 over SSL and Online
4. Under Custom Servers, yours shows Online; the default servers switch to Not Used.

Screenshots taken in Bull Wallet on iPhone. The green frame marks the row to tap: it is not part of the app.

As soon as a custom server exists, Bull stops querying its own: there is no silent fallback to wes.bullbitcoin.com. The setting applies to on-chain bitcoins and to Liquid; it does not concern the application's exchange service, which follows its own path.

Bull only exists on iPhone and Android: there is no computer version. The advanced options: Stop Gap, Timeout, Retry Count, Validate Domain: do not need to be touched.

Where to find the application

The wallet's website links to the App Store and the Play Store; the code is published by Satoshi Portal. The settings path is described in their guide.

The four common issues

If nothing connects.

· The wallet stays "not connected"

Nine times out of ten, the tunnel is closed. Open AmneziaWG, check that the tunnel is active, then restart the wallet's synchronisation. Our node only answers inside the tunnel.

· The tunnel refuses to open on Android

Another VPN application is holding on. System settings, VPN section: turn off Always-on VPN and Block connections without VPN for those other applications.

· The setting was saved but nothing changes

BlueWallet and Nunchuk only apply the server change after the application restarts. Close it completely, then reopen it.

· Electrum synchronises, but not only with you

The connection mode stayed on automatic. Go back into Tools → Network, Server tab, and choose Connect only to a single server.

Versions used for these screens

AmneziaWG 3.1 on Mac, 3.1.0 on Windows, Electrum 4.8.1, Sparrow 2.5.4, BlueWallet 8.0.2, and the Nunchuk documentation from February 2022. The Sparrow screens are the official screenshots from the project; the Electrum, BlueWallet and Nunchuk ones are reconstructions faithful to the published wording, for lack of official screenshots. An updated piece of software may move a button: the bold labels remain the safest landmark.

Sources: Amnezia documentation · Electrum documentation · Sparrow quick-start guide · BlueWallet wiki · Nunchuk network settings.

And other wallets

Specter, the Blockstream app for a Jade, or any wallet that accepts an Electrum server are set up the same way: look for "Electrum server" in its network settings, enter the host, port 50002, and turn on the encrypted connection. Your customer account reminds you of these three values at any time.